

The Shop Jeep – 2022 Jeep Wrangler Unlimited Rubicon JL
In the middle of 2021, we decided a Jeep was the ideal next vehicle for us. So, we visited Jeep’s website, designed it to our specs, and ordered it up. We ordered it in white to be a blank canvas. We optioned it with the Xtreme Recon Package which adds 17″ beadlockers, 35″ tires, and a 2″ lift – right from Jeep. We also added the Trailer-Tow and Heavy Duty Electrical Group which includes the 240A alternator, 700A battery, Class II Receiver Hitch, 7 and 4-pin trailer harnesses, and auxiliary switch panel.
It arrived in March of 2022 – long delays due to parts shortages! Read along as we totally transform our brand new Jeep!


The first order of business was to start outfitting it to suit us. We had already decided on bumpers, winch, lighting, and power steps. Here are the parts we chose:
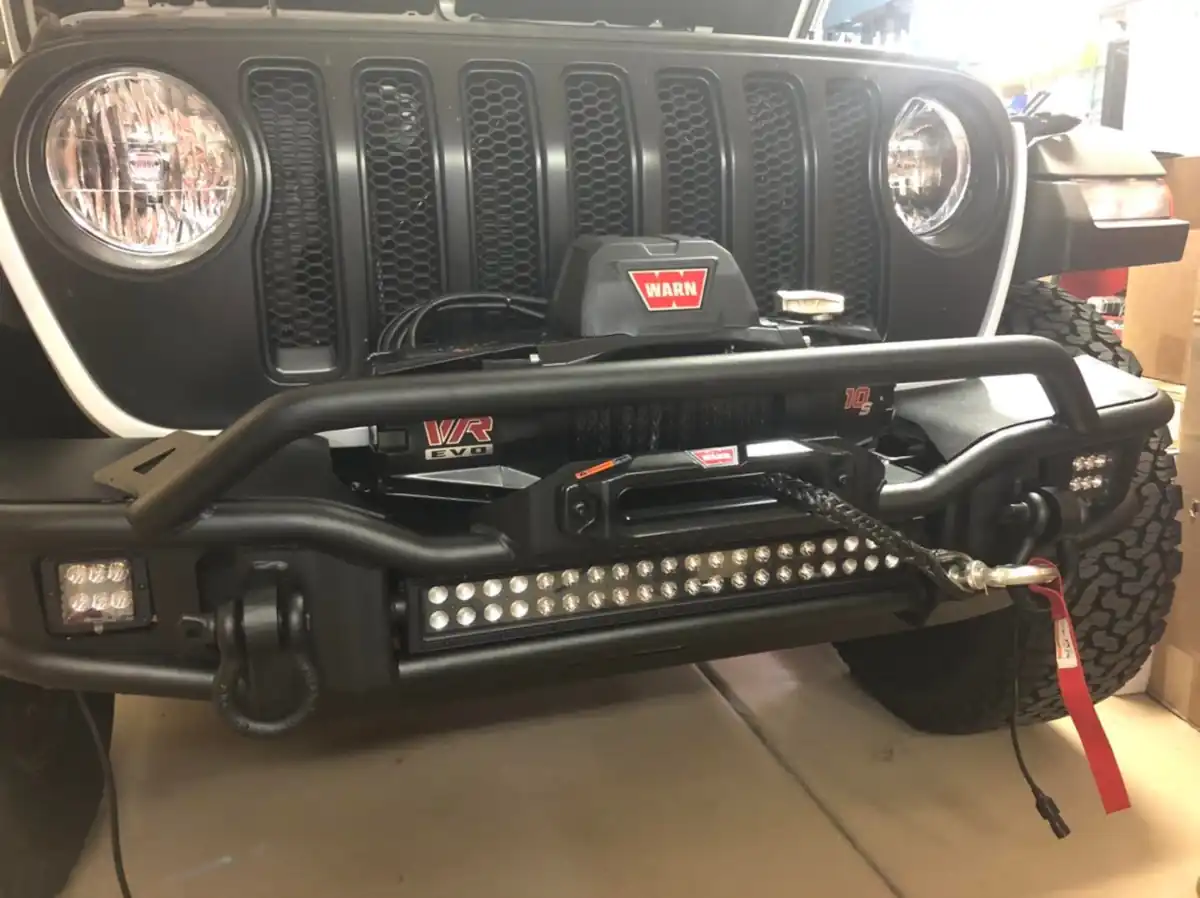
- Rough Country Front Winch Bumper – part # 10647
- Rough Country Rear Bumper – part # 10648
- Warn EVO 10-S 10,000lb Winch w/ synthetic line – part # 103253
- Rough Country 30-inch LED Cowl Bar – part # 70054
- Rough Country 50-inch LED Windshield Bar – part # 70065
- Rock Slide Engineering Power Steps – part # BD-SS-300-JL4
Bumpers & Winch
After all the parts showed up, it was time to go to work! The OEM bumpers are super complex and comprised of many pieces – bring a lunch. The rear bumper has to be totally disassembled after it’s been removed to access the back up sensors and associated harness so they can be relocated to the new bumper. It’s a bunch of screws!


For the rear LED cubes, I made a custom harness of 16 AWG GXL, terminated it with a Metri-Pack 150 Series Connector, and dressed it in split braided tubing. This was routed along the frame, up through the body in front of the rear driver’s side seat, along the threshold forward, and then over to the passenger side front footwell – where the interior AUX harness can be found.
I cut the stock pigtail from the front bumper fog lamp harness and soldered it to the LED cube harnesses in the new bumper. This allows the stock driving light circuit to power these, preserving the four AUX switches for the three front LED bars and the LED cubes in the rear bumper.


Here is a list of parts we used for this part of the project:
- 3-Position Metri-Pack 150 Series Connector Kit
- 16 AWG GXL primary wire
- Semi-Rigid Wrappable Split Braided Tubing
- Adhesive Lined Heat Shrink
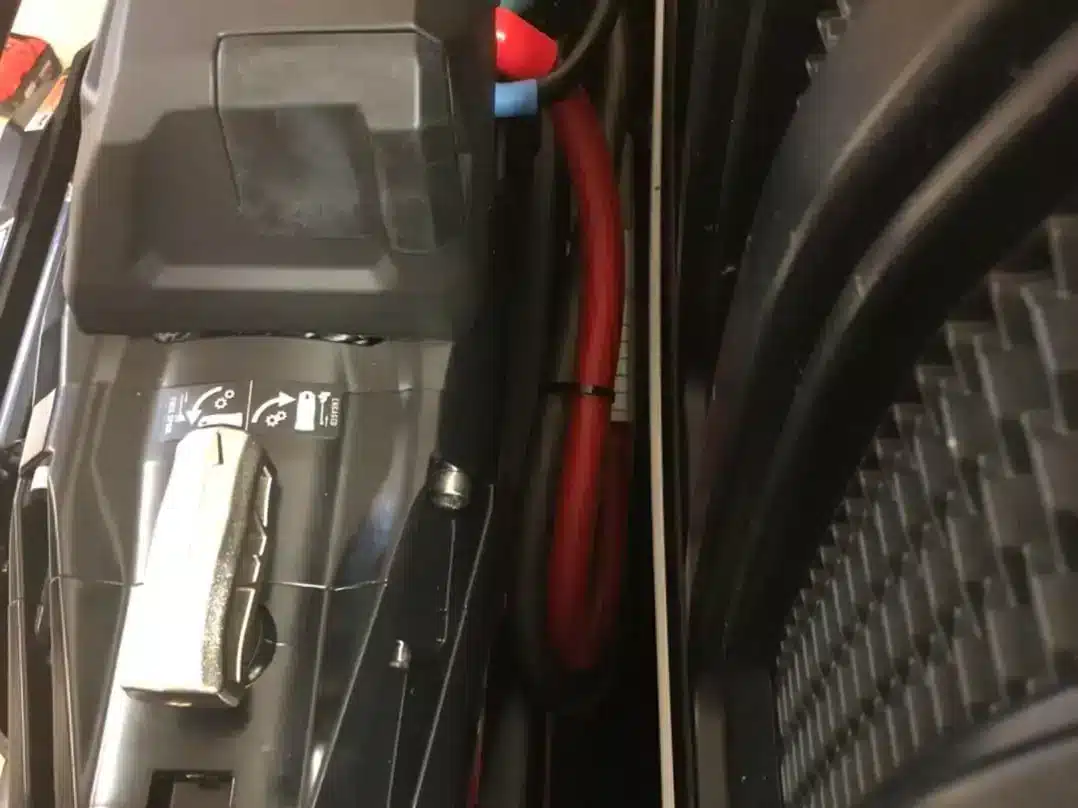
Installing the Warn winch is easily accomplished with the bumper on the bench, so that’s what we did. The stock winch cables are a joke – so we tossed them in the bin, right where they belong. Rather, we used this opportunity to develop a complete winch / booster cable set for the Jeeps.


The winch bolts on the bumper from the underside, so again, easiest on the bench. If you’re installing this same bumper, I recommend that you install the LED light bar in the front of it first – that was the most difficult part of the job as it’s quite tight fishing the hardware through the mounting tabs into the bar.


I typically provide service loops for components that may need to be unbolted, removed, etc., at some time in the future. Most aftermarket LED lighting harnesses have no provisions to unplug the light at the light end – that adds cost. So, I put all of the connectors on the passenger side so that if the bumper need be removed, all lighting and the winch is easily disconnected.


We developed our 1/0 AWG Booster Cables that Don’t Suck – Jeep Wrangler winch / booster cable set for these model Jeeps based on this installation. As you can see, this is a very well thought-out kit!
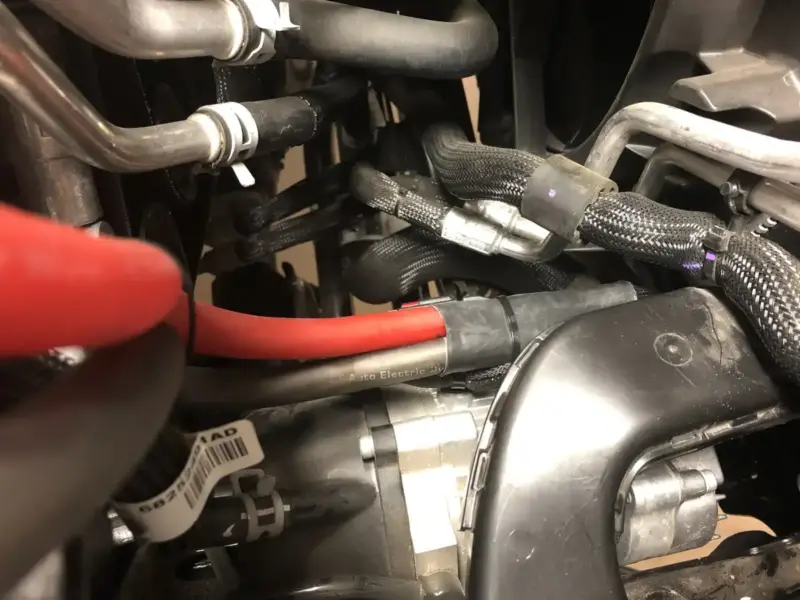
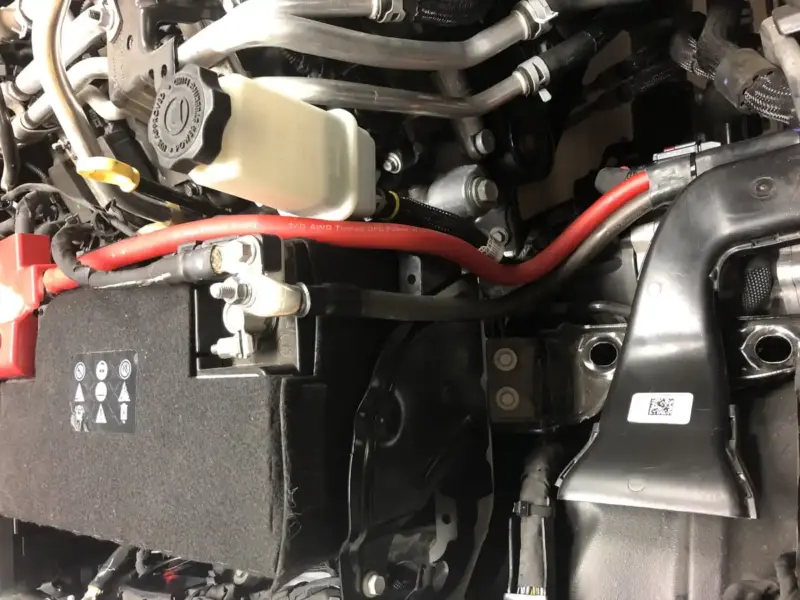
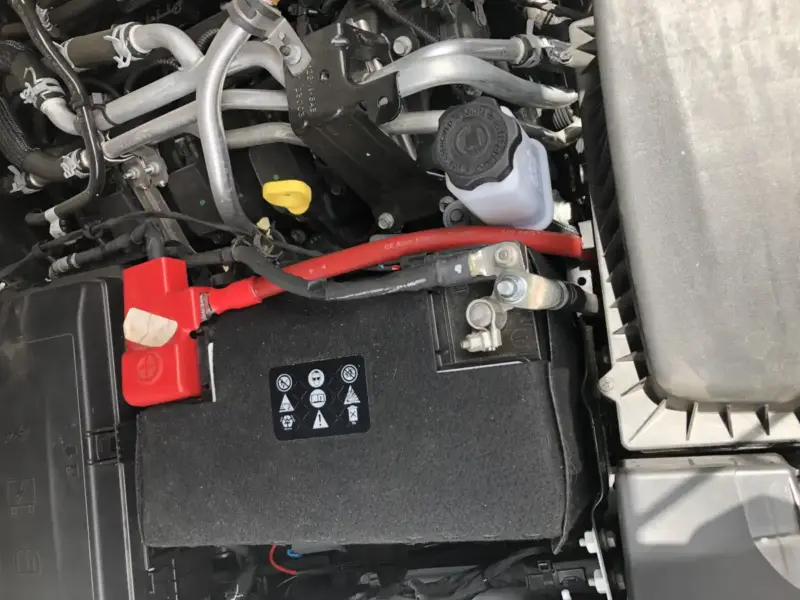
Notice that there isn’t a ton of stuff going in all different directions from the battery terminals. That’s the idea – neat, sane, serviceable.
Decal’d up!
We elected to have the decals installed on the Jeep before putting the power steps on. So, I removed the stock rock rails and dropped the jeep off for the installers to do their magic. We worked with the talented folks at Five18 Designs in Chandler, AZ and they hit the ball out of the park.

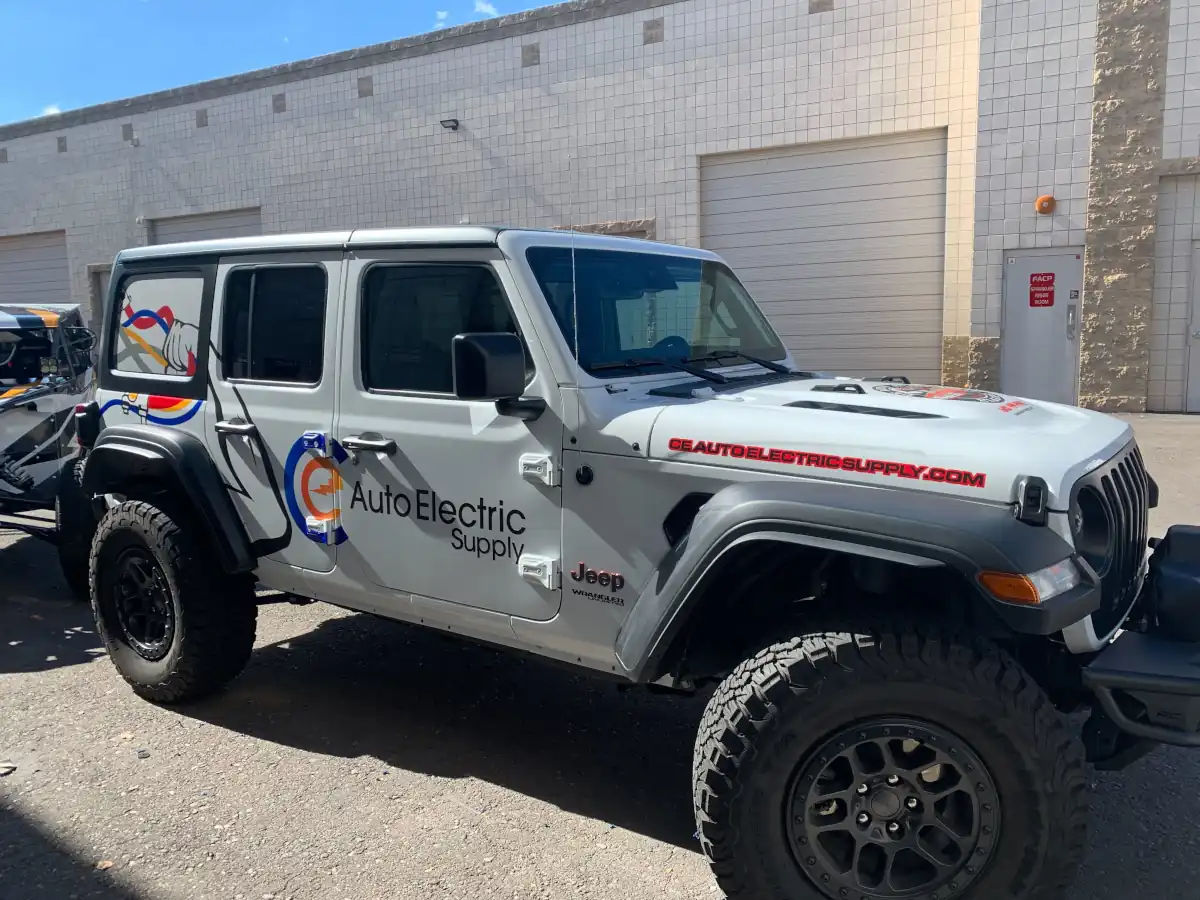
This really came out well!
Cowl and Windshield LED Bars
Both of these are pretty straightforward installations and the additional lighting they offer is just stunning! I spent a bit of time routing the harnesses for them neatly in the cowl area and into the engine bay on the passenger side.
Once these were installed, all wiring from the front bars was routed to the void near the battery, where the underhood AUX harness can be found.


The underhood AUX harness is just tape-wrapped with Tesa tape and all leads are simply unterminated (flying). Jeep provides a kit with adhesive-lined heat shrink for connecting to these wires, which is nice, but we didn’t use it. Rather, I terminated the harness with a Metri-Pack 280 Series Connector. Following the legend in the Jeep Owner’s Manual, I connected all the front bars to this harness via the mating connector.
The interior AUX harness is found above the footwell on the passenger side, also taped up with Tesa tape, also flying leads. This harness is a duplicate of what is found underhood, but also contains +12V Battery and +12V Switched leads. This was the ideal place to interface the rear LED cubes. I terminated it with one of our 7-Position Metri-Pack 480-150 Series Connector Kits.
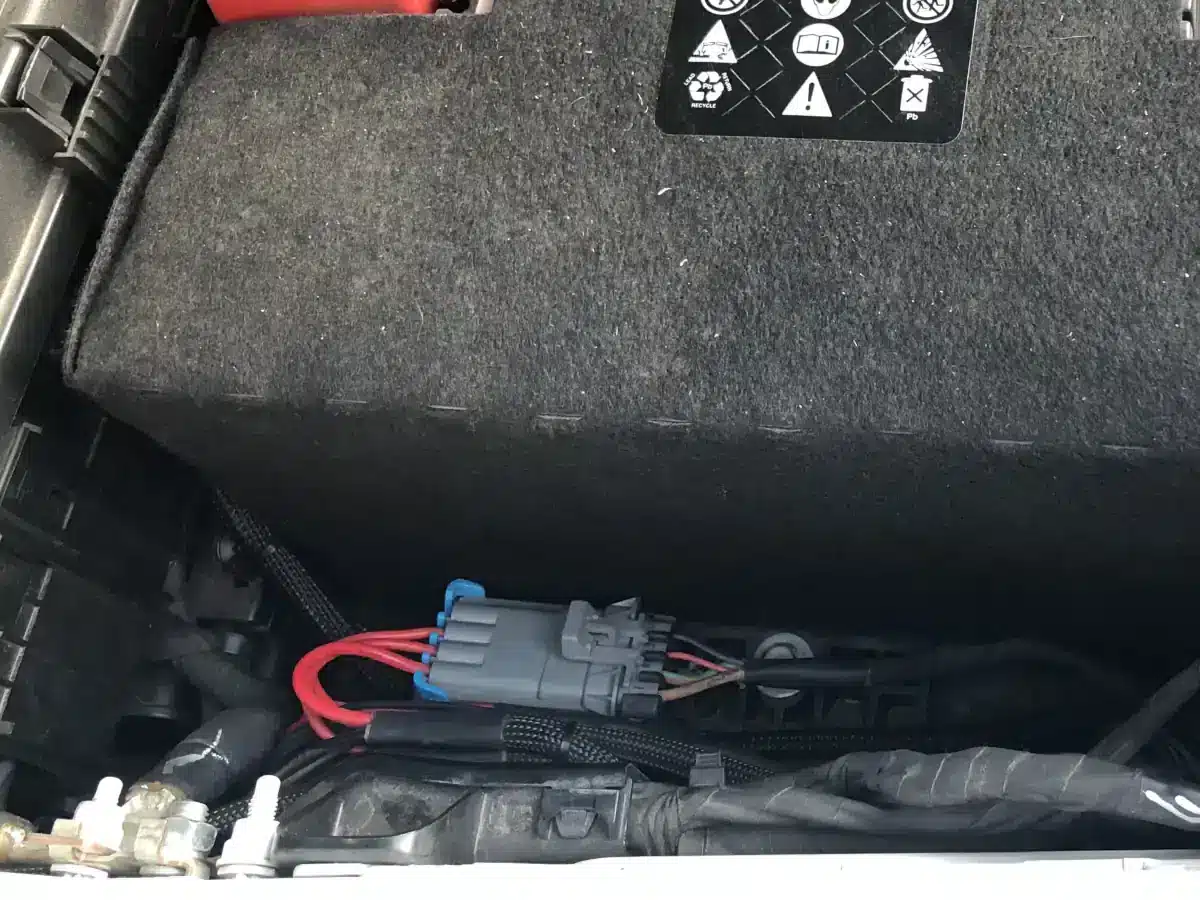


Vehicles as this one have a lot of thought put into them at the factory – specifically, when it comes to their customers adding aftermarket electronics. They’ve gone out of their way to make that easy here, so best to make use of it. I grounded all the bars to the vacant ground stud, right next to the AUX harness. All I had to supply was an 8mm nut and a ring terminal.
Here is a list of parts we used for this part of this part of the project:
- 4-position Metri-Pack 280 Series Connector Kit
- 7-position Metri-Pack 480-150 Series Connector Kit
- Cable Tie Anchors
- Adhesive Lined Heat Shrink
The Rough Country parts exceeded our expectations for fit, finish, quality, and performance, especially considering how affordable they are. The parts were all easy to install and included all hardware required to achieve excellent fitment.
Power Steps
This part of the project was the least fun. We separated the project into two parts – the harness installation and the step installation. All of this is outlined in the installation instructions, so I won’t bore you here. Several weeks lapsed between the time I got the harness installed and a day where we could make time in the shop to get the steps themselves installed.
The steps look great and work awesome. I had a few nitpicks on the fitment but that’s the kind of stuff that helps me in our product development!
From the word go, the Jeep was designed to be the subject of a new logo. We couldn’t be happier with how it turned out!
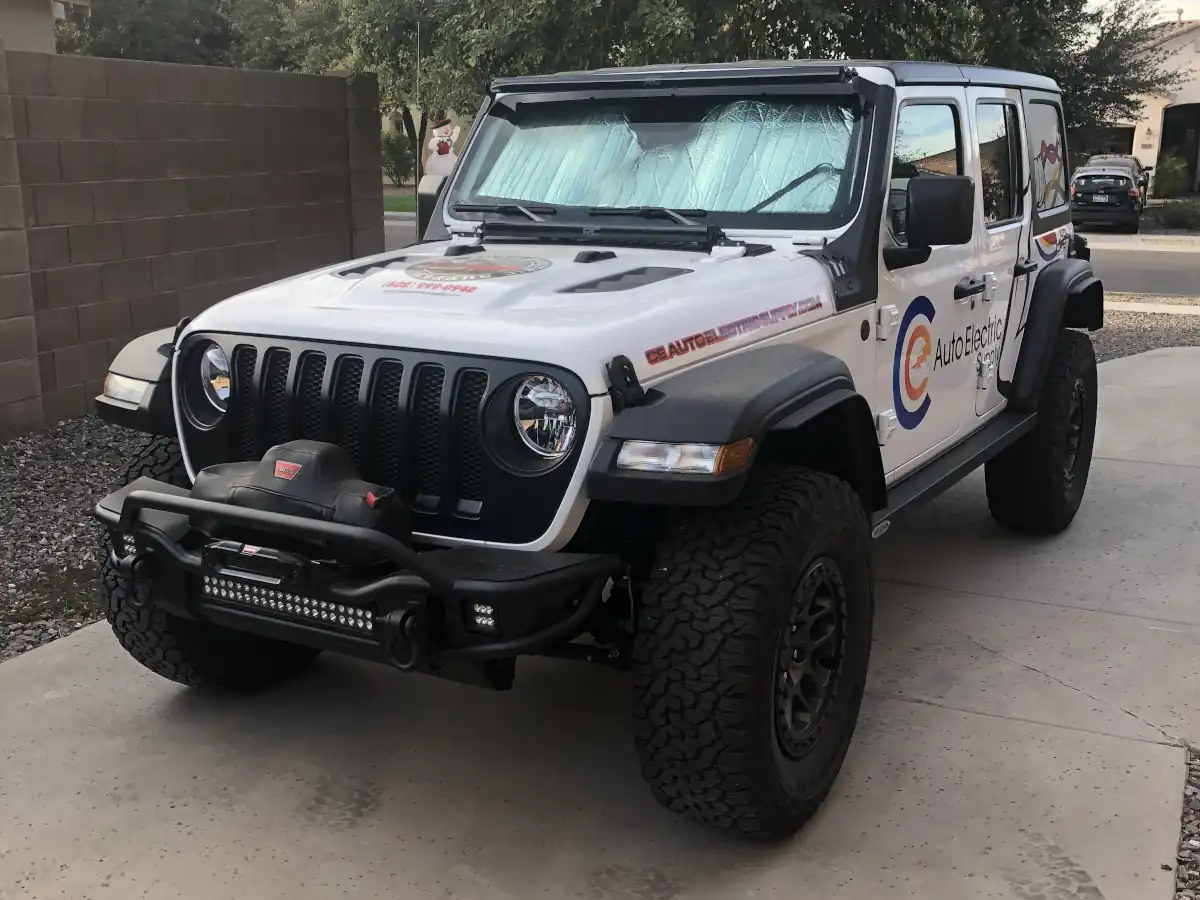
Time for some off-roading! We took the Jeep up 4 Peaks, to Bulldog Canyon, and down through the Oro Valley from Globe.


Summary
We’re super happy with how the Jeep came out. Everyone just loves it! All of the modifications we did to the Jeep only add to it’s usefulness and utility and all are within the grasp of the weekend enthusiast.


