

The Shop Jeep – Part 2, Installing a Full On-board Air System

On-board Air
After the Bulldog Canyon run, where there are many BIG rocks, I realized that on-board air would be nice. Air down the tires to minimize teeth-chattering impacts and allow them to contour to the boulders, then air them up to drive home. So, we ordered the following parts:
- ARB Twin 12V Compressor, part # CKMTA12
- ARB Mount Kit for 2018+ Jeep Wrangler JL, part # 3550220
- (2) ARB Air Compressor Reinforced Hose, 1.5M, part # 0740204
- ARB 90 degree 1/4″ NPT to JIC-4 Elbows (2pk), part # 0740110
- ARB Hose Coupler, Remote Mount, part # 0740111
- Viair one gallon Tank, part # 91010
It took me three different orders to figure that list out! One of the challenges is that ARB discontinued their one gallon tank, for which a bracket is included for in the 3550220 (bummer). So, I sourced the Viair tank and then had to wait until I figured out where to mount it to know what NPT to JIC-4 adapters would be best suited for the air line runs. Due to time constraints, I had to do this installation over the course of two different weekends.
On the Bench
Follow the instructions ARB provides with the Jeep Wrangler JL Mount Kit for all of the mechanical stuff. You’ll want the air line from the compressor to the tank to be connected up, the compressor mounted to the bracket, the switch / air coupler mounting plate mounted to the main bracket (I even popped in the switch and mounted the air coupler), and the harnesses connected before putting the compressor in the vehicle.
I didn’t like either of the harnesses ARB included. The switch harness was overly complex and had a bunch of functionality this installation won’t require (it has E-Lockers) – I want to push the button and turn ON the compressor when the key is in the ACC or RUN position. The power harness has a pair of inline MAXI fuse holders integrated into it as well as having the ground leads run all the way to the battery. Neither was appealing. So, I made my own.


These late model vehicles are tightly packaged. Our harnesses greatly simplified the installation! I didn’t feel it necessary to connect the illumination in the switch to the dash lamp circuit for a switch mounted under the seat. But, how lame would it be to have a cool backlit switch and not use that? So, I wired the Carling Switch connector (plugs right into the ARB switch) in such a way that it’s illuminated when you turn the switch ON. Cool and simple.
Yep, we’re offering this as a complete kit – details below!
In the Vehicle
It really wasn’t necessary to remove the passenger seat. If you do, you’ll have to disconnect the battery the whole time the seat is unplugged as the seat has an air bag integrated into it. Plus, the harness on the bottom of the seat is a hassle to disconnect. I had more than enough room by collapsing the seat-back forward and then leaning the seat-back onto the rear seat cushion as far as it would go.


I routed the harnesses along the floor as shown above. The power leads go through the grommet, under the jeep, and then along the body to the area up next to the battery. The ground leads route to the kick panel, and the pink wire from the switch harness (dressed) runs to the interior AUX harness (see Part 1). Connect that to the Pink / Orange Lead, noted as IGNITION in the manual. No fusing is necessary is it’s fused in the PDM under the hood with a 10A fuse.
Under the Vehicle
Once the harness is fed through the grommet in the floor, I slid on a length of our split-braided tubing to protect it from rocks and debris. I followed the routing for the power harness for the RSE steps (which were installed in Part 1). From underneath and inside the passenger fender liner, you can see a nice route all the way up to the area next to the battery. Always anchor such a run properly.
I also elected to mount the air tank and route the lines to it while down here. I found a nice little nook right in front of the fuel tank and away from the heat of the exhaust – perfect. Route the air lines from the compressor and from the air coupler down through the grommet just in front of the compressor.

Under the Hood
Once under the hood, things go quickly. In addition to the ARB power harness, I also needed provisions to connect the power harness for the RSE steps. I chose our Littlefuse 4-position Wateproof PDC for this. [Included in our kit, listed below!]


I found a nice little spot to mount the PDC right to the side of the air box. This keeps the area next to battery open and provides access to the Metri-Pack connector, grounds, etc. The 20A MINI Fuse is for the RSE steps, leaving one fuse location open and available for a future accessory.
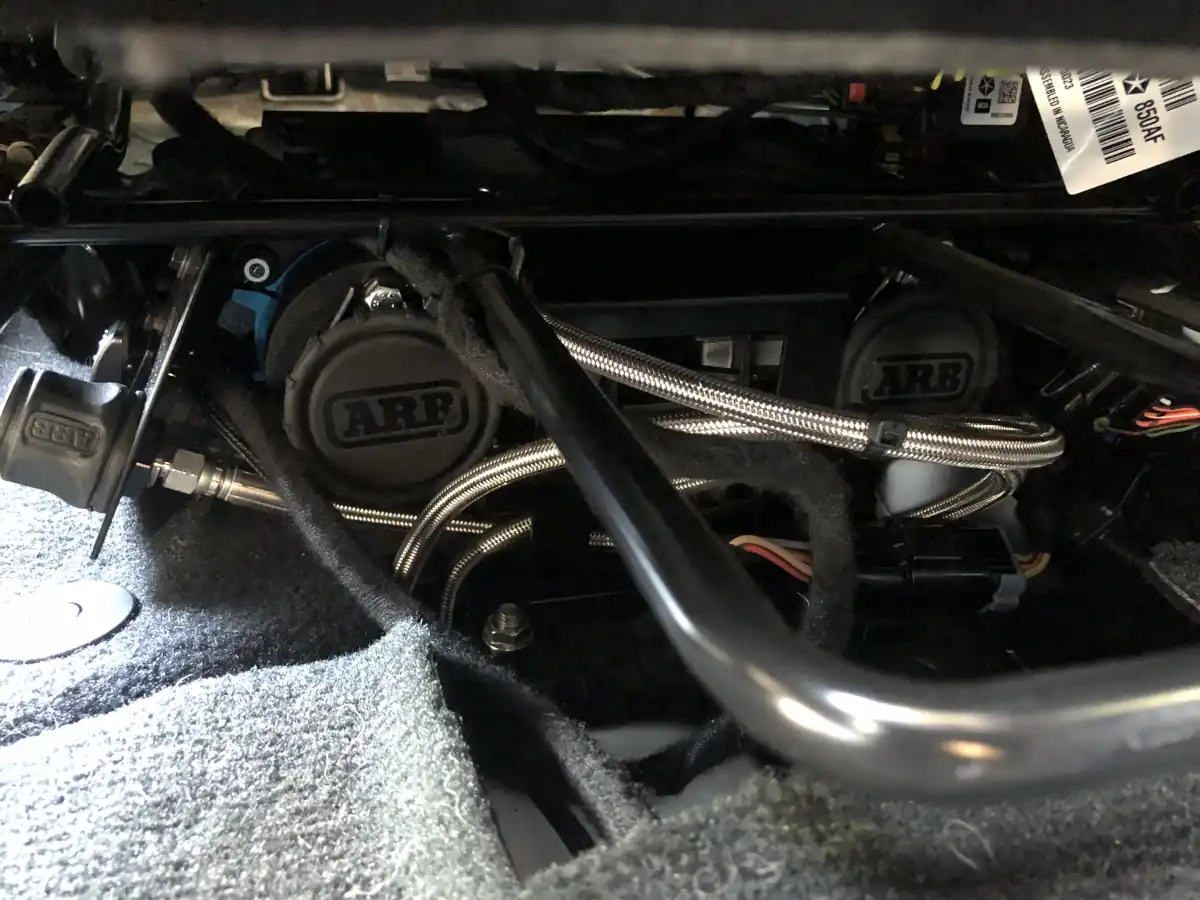
Final Assembly
Now that everything is plumbed and wired, test the compressor to be sure it works. Ours worked flawlessly and man, does it fill up the tank quickly – I’m anxious to put this to work on the trail.
Time to bolt the seat in and finalize the installation. Take the time to anchor the seat harness to the underside of the seat structure so that it permits full fore and aft movement and doesn’t catch on any of the parts under the seat.

Outing to Saguaro Lake
After the on-board air was finished, we all got together and headed out to the Saguaro Lake. This was another excellent and enjoyable outing with LOTS of serious climbs and descents. Here’s some great footage that I captured during that trip.
Summary
We added a LOT of functionality to our Jeep. Five lighting zones, power steps, a big-ass Warn winch, Service Style Booster Cables that Don’t Suck, and an ARB twin compressor setup! And we ended up with ZERO stuff sprouting off of the battery in all directions like you would see in a typical installation. That’s the CE Auto Electric Supply difference. Safe. Tidy. Serviceable. And above all, performance!
Oh, and we developed a few products along the way to make your life easier!
- 1/0 AWG Booster Cables that Don’t Suck – Jeep Wrangler
- ARB Dual Compressor Installation Kit – Jeep Wrangler JL
- Jeep Wearables – Well, ya’ have to look cool too!
This fall, we’ll add some audio . . . stay tuned!


